




How to assemble a mini fan?
 Dec 22, 2025|
 If you're in the market for a convenient and efficient way to beat the heat, look no further than mini fans. As a seasoned supplier of these essential gadgets, I'm here to guide you through the process of assembling a mini fan. Whether it's an Outdoor Mini Fan for your adventures, a Small Fan For Sleeping to ensure a restful night, or a Tiny Battery Fan for on - the - go use, the assembly process usually follows a similar set of steps.
Understanding the Components
Before you start assembling, it's crucial to familiarize yourself with the different parts of the mini fan. Most mini fans consist of the following key components:
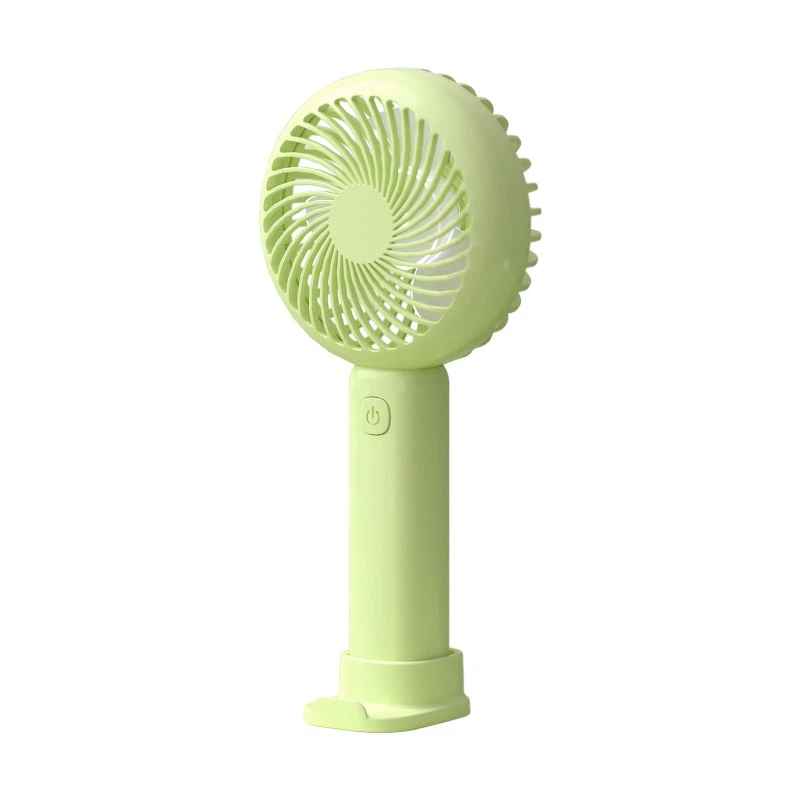

- Blades: These are the rotating parts that generate the airflow. They come in various shapes and sizes, but typically, the more aerodynamic the blades, the better the air circulation.
- Motor: The motor is the powerhouse of the fan, responsible for spinning the blades. It can be an electric motor, which requires a power source like batteries or a USB connection.
- Housing: The housing encases the motor and blades, protecting them from damage. It also provides a handle or a base for you to hold or place the fan.
- Power Switch: This is used to turn the fan on and off. Depending on the model, it could be a simple push - button or a sliding switch.
- Power Source Connector: If it's a rechargeable fan, this is where you plug in the charging cable. If it uses batteries, it's the compartment where you insert the batteries.
Step - by - Step Assembly
Let's take a detailed look at how to put these components together.
Step 1: Unpacking
First, carefully open the package of your mini fan. Lay out all the components on a clean, flat surface. Make sure you have all the parts listed in the instruction manual. If any parts are missing, contact our support team immediately.
Step 2: Installing the Blades
The blades are usually designed to fit snugly onto the motor shaft. Align the center hole of the blades with the motor shaft. Gently press the blades onto the shaft until they are firmly in place. Some models may require twisting the blades slightly to secure them properly. Be careful not to apply too much force, as this could damage the blades or the motor shaft.
Step 3: Attaching the Housing
Next, place the motor (with the blades attached) into the housing. There are usually guides or slots in the housing that help you position the motor correctly. Once the motor is in place, align the edges of the housing and snap the two halves together. Some fans may use screws to secure the housing. If this is the case, use a screwdriver of the appropriate size to tighten the screws gently. Make sure not to overtighten the screws, as this could crack the housing.
Step 4: Installing the Power Switch
Locate the opening in the housing where the power switch is designed to fit. Insert the power switch into this opening. Some switches may come with a small connector that needs to be attached to the motor's wiring. Follow the wiring diagram in the instruction manual to ensure the correct connection. If you're unsure, it's always a good idea to double - check with our technical support.
Step 5: Connecting the Power Source
If your mini fan uses batteries, open the battery compartment, which is usually located on the back or bottom of the housing. Insert the appropriate batteries according to the polarity markings inside the compartment. Close the battery compartment securely.
If it's a rechargeable fan, connect the fan to a power source using the provided charging cable. You can typically plug it into a USB port on your computer, a power bank, or a wall adapter.
Testing the Fan
Once you've completed the assembly, it's time to test the fan. Flip the power switch to the “on” position. The blades should start spinning smoothly. Listen for any unusual noises, such as rattling or grinding. If you hear any strange sounds, turn off the fan immediately and check for loose parts or incorrect assembly.
If the fan doesn't start, first check the power source. Make sure the batteries are inserted correctly and have enough charge, or that the charging cable is properly connected. If the problem persists, contact our customer service for further assistance.
Tips for Assembly
- Read the Manual: Always read the instruction manual that comes with your mini fan. It contains specific information about the assembly process, safety precautions, and maintenance tips.
- Use the Right Tools: If the fan requires screws, use a screwdriver of the correct size. Using the wrong tool can damage the screws or the housing.
- Keep Parts Organized: As you unpack and assemble the fan, keep the small parts organized. This will prevent you from losing any components and make the assembly process smoother.
Why Choose Our Mini Fans
Our company is dedicated to providing high - quality mini fans that are not only easy to assemble but also offer excellent performance. Our Outdoor Mini Fan is designed to be durable and portable, making it perfect for camping, picnics, or outdoor sports. The Small Fan For Sleeping operates quietly, ensuring a peaceful night's rest. And our Tiny Battery Fan is extremely compact, allowing you to carry it with you wherever you go.
Contact Us for Procurement
If you're interested in purchasing our mini fans in bulk, we're more than happy to discuss your requirements. We offer competitive pricing, flexible order quantities, and excellent customer service. Whether you're a retailer looking to stock our products or a business in need of promotional items, we can provide the solutions you're looking for. Reach out to us to start the procurement process and let's work together to keep your customers cool.
References
- General knowledge of mini fan design and assembly from the experience of being a mini fan supplier.
- Instruction manuals of various mini - fan models provided by the manufacturer.